Punctuation
Turning now to punctuation - to make a period, take your L and remove everything except the joint where the two lines meets - this lets you measure a period that is exactly as high as the width of the bottom bar used to make your letters. Remember to adjust the spacing inward.


A comma is a modified period. Add a new point or two on the bottom and stretch this point down and maybe to the right until it looks right to you.


To make an apostrophe, take the comma and move it up as high as the other capital letters. One tip is to use your own monitor as a ruler. Instead of measuring with grids or a piece of paper or something, to move the comma as high as it needs to go, follow this procedure: using Softy, for example, click on the T - scroll the screen down until the top line of the T is at the very top of your monitor. Then click on the comma glyph and move the comma all the way to the top of your screen - now you know it's the same height. You can also use the other sides of the screen, such as the right side to measure equal spacing between all the characters. Some font making programs may not lend themselves to using this method, so check it out on the softare you use.


To make a quotation mark, take the apostrophe, copy its contour and paste it in as a second contour. Move the second contour to the right until it looks correct - this now is 2 apostrophes in the same glyph - adjust the spacing.


To make a colon, copy the period glyph into it. Copy then the period contour within the glyph and paste it in as a second contour. Drag the new contour upwards until it looks right to you. To make a semi-colon, copy the colon glyph into it. Then delete the bottom contour (the period part, leaving the "upper period"). Then copy the comma contour (not the comma glyph, just the shape of the comma) and paste that into the semi colon glyph - you're done. Note that here, as with a number of the tips above, when I say "copy the contour" that means copy the shape on the contour WITHIN the glyph - otherwise, if you copy the glyph when you're suppose to only copy the contour, when you paste what you copied into a partial glyph, your partial glyph will be deleted and replaced with the entire copied glyph - here, you don't want the comma glyph - you only want the contour because you don't want to lose the upper part of the semi-colon that is already there.

To make an exclamation point, take the H, remove the right side and the middle bar. Then select the remaining line and shorten it by dragging the bottom edge of the selected contour upward. Then copy the contour of the period and paste it into the exclamation point. Adjust the space between the point and the line as needed and adjust the glyph spacing. If you have a simple I, you can just start with that instead of the H.

A question mark is made by taking your S, flip it horizontally and remove almost the entire bottom half (keep the middle horizontal section and just a touch of the vertical lower line on the left side). Insert in the period contour like you did for the exclamation point and adjust the space between contours as needed.

To make parenthesis, take your C and remove the right half of it - and adjust the glyph spacing. That's it. Copy it and paste it into the other parenthesis glyph and flip it horizontally.


To make brackets, take your D and remove two thirds of it starting from the right hand side - this leaves just the left vertical line and a little bit of line at the top and bottom to make the bracket. If you like, you can elongate the bracket vertically, equally at the top and bottom, to create a more "bracketed" look. Copy it and flip it to make the matching bracket.

To make a hyphen, take the E, flip it horizontally, remove everything except the middle horizontal bar. This is the hyphen, already placed up against the left side of the glyph for spacing purposes. You may want to then shorten the hyphen some so that it is not as long horizontally as the E - if you do shorten it some, adjust the right side spacing.

The equal sign is 2 hyphen contours spaced a little up and a little down from the horizontal middle of the glyph.

A plus sign is a hyphen with a vertical line cutting down the middle.

To add the vertical line, remember that some of the programs will automatically insert the new point exactly in the middle of the 2 surrounding points - this will help you measure the middle of the hyphen. I sometimes use a piece of paper with a pen mark to measure parts of a character on the screen itself - or to measure spacing on the actual screen. This works very well, but it can be time consuming; so where you can, you may want to use the "tricks" like point insertion and the sides of the screen to cut down on that time.
Many of my fonts don't include @ signs, ampersands, asterisks or number signs because they are not used as often and are more difficult to make - and because I'm lazy (though recently a majority of my newer fonts do have full character sets). If you want to make an @ sign, think of it as an O with an "a" in the middle - from there modify it until it looks right. I do make dollar signs, since all that is required is inserting a vertical line through the S. I do add the bottom under score ____ like that. I take the L and remove the left vertical line. Then I make the remaining horizontal bar on the bottom a little thinner by selecting the contour and dragging the top edge down some. Then I move the entire contour downward just below where the other characters bottom out.
I also make the forward and backward slashes - just take the H - remove all points but the two on the lower left corner and the two on the upper right corner - this is your forward slash. Copy the glyph and flip it horizontally for your backward slash.
Up until recently I didn't make internatinal characters because, for one thing, I don't use them myself and so I wasn't as familiar with them to do it correctly. As I've learned recenty, if you're going to do it correctly, there are A LOT of them. BUT... the good news is that it's not hard, just time consuming. Adding dots, accents or tildes (for example) to the letters you've already made is as straight forward as it gets - it just takes awhile. But if you hang in there, you can say you've made a complete font. Note also that a full charcter set will likely more than double the final file size for the font.
Back to top
Lower Case Letters
Finally, some lower case tips. Many of my fonts are too bulky or specialized to lend themselves to lower-case, but on occasion I do use them. Sometimes my upper and lower cases are the same height and width, but I use them to make "alternate characters" for certain letters - such as a "traditional N" in the upper case and an "upside down U" N in the lower case (this happens when I can't make up my mind which of 2 styles for a letter looks better).


Also, you can have different styles of lower case. For example, one style is to have a lower case that is shorter vertically then the upper case, but still uses all upper case format characters. This means that you have your upper case "E", and your lower case is just like it only not as high "E" - this is as opposed to the "e" that has the closed contour in its upper half instead of the 3 horizontal lines of the upper case "E".


The other style is to make a more "traditional" lower case letters where several letters will have truly different contours, instead of just being shorter.
Looking at the more "traditional" lower case, one thing to notice is that if you take your capital B and remove the top horizontal bar and the top half only of the right vertical bar, that leaves you with a lower case "b". Flip that horizontally, you have a "d". Flip the "d" vertically and drag the contours downward, you have a "q" - note that you need to drag it down so that the underpart of the middle horizontal bar touched the bottom base line, and that will make your lower vertical piece drop below the baseline for the "q" look. Flip this "q" horizontally and you have your "p".




Take the "q" and round out the bottom reaching vertical line and "hook" it leftward, and you have a "g". Take this "g", remove the left loop (leaving the entire vertical bar on the right side) and you have a "j". You may want to add a spaced dot to the "j", and you may need to move the "j" contour towards the left side of the glyph for spacing purposes (be sure to adjust the right side spacing then).


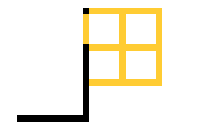
Using the "b", remove the bottom horizontal bar and you have a lower case "h".


Using the "p", if you remove the vertical bar that drops down and round the bottom left corner (and maybe the upper left corner), you have an "o". From the "o" you can make a "c", "u", "n", "m" and "w" similar to how I've described them above.





A lower case "l" is made by taking the upper case H and removing the middle horizontal bar and the right side vertical bar. Another "l" is to use your upper case I if it's a simple I. If it's an I with top and bottom bars, remove the left half of the upper horizontal bar (this is like a reverse number 1 described above).

You can take your capital Y and simply drag it down some to match the "p" spacing for a lower case "y" - but for "y", you may want a more traditional sloping bottom line. Or just take your lower case "g" and remove the top horizontal bar.


A lower case "r" is basically the "o" with the right vertical side and the lower horizontal bar removed. You can add a notch to the "r" at the top left, or otherwise modify it, but that will give you a basic "r".


A lower case "i" can be made by taking the upper case I and, if needed, removing the top and bottom bars. If you need to remove the top and bottom bars, you will have to move the contour to the left side of the glyph and adjust the right side spacing. Then shorten this lone vertical bar and add on top of it the period contour - this is your "i". Size and space the 2 contours of the "i" as needed (or just flip your exclaimation point vertically if it's already made and size accordingly).

The other lower case letters can often follow the same kind of procedures as above, just scaled differently against the font's upper case letters.
Two last notes:
(1) your lower or upper case "f", when done, can be flipped vertically to make one style of a lower case "t" - just move it up or down some if needed to fit right with the other letters.


Also, a lower case "f" can be made by taking the upper case F and rounding the upper left corner of it, where's it was previously a right angle;
Another "t" is to take a single vertical line (like maybe your 1) and add a horizontal cross-bar to it (either in the middle, or towards the top end, or whatever - be flexible).

(2) if you make a lower case "e" that has a closed upper half (like in this "e"), you can flip the "e" vertically, then horizontally to have a basic "a" - though you may have to round or un-round some joints to fit your liking.


Another lower case "a" can be made by taking the "o" and adding a straight vertical line to the right side - or you can take the "d" and shorten the top vertical line on the right just enough to make an "a" without still looking like a "d".
Back to top
Conclusion
And that's about it. Of course, you can't apply these tips like "rules" where they always work in all instances. Quite the contrary. Fonts are more complicated than just flipping a shape here and there, and continuity of your font's unique style will cause a number of these tips to simply not work well. The idea is not to use this as a manual, but to call your attention to how a lot of the letters of the alphabet are closely related to one another. The more you think along these lines and look to identify these similarities between letters, the easier it will come to you. When you've practiced long enough with these ideas in mind, it will amaze you how you stop even having to think about it... and at how much faster letter making comes to you. So again, use this only to better understand the letters you'll be making.
I hope this tutorial is at least somewhat useful and that it provides some help in your efforts. If you have any feedback (like it's confusing or repetitive in places), just e-mail me and I'll try to modify this tutorial on an ongoing basis to reflect such feedback. Please remember, though, that this does not and will not address technical issues. If you have technical questions (like "how come I can't delete certain points" or "how do I make the font embeddable", for example), please refer to the technical documentation that came with your font making software (or visit their web-site for any possible support). If all else fails with these types of questions, you may want to ask it in a font forum.
Finally, here's is a link to Ray Larabie's font-making tutorial that is much more advanced than this and should prove very useful:
Ray Larabie's Font Creation Tutorial
Thanks, and good luck font-making!

Iconian Fonts

